My lovely wife asked if she could be a guest writer today. I've graciously allowed her to share our photo-prop process. You can follow her blog at http://walckthisway.blogspot.com/.
The Hubster wanted to redo some chairs as photo props. Being the loving, diligent, and crafty wife that I am, I agreed to help :) So, here are our DIY chair make-overs:
 |
| Step 1: Purchase cool, but rickety, old chairs off local yard sale site. |
 |
| Step 2: Paint them fun colors...or rather, have the Hubster paint them fun colors. |
 |
| Step 3: While paint is drying, cover seats with batting. I did a double layer, because I like a soft seat for my tush. |
Step 3: Make sure the Hubster has purchased the correct size staples for the gun. Otherwise, you have to do what I did and make a second trip, dig through your car for the correct change (because you forgot your wallet), and generally make a fool of yourself for the local hardware store cashiers.
 |
| Step 4: Staple batting and then fabric to the chair seats. Make sure to pull tight, and that you have rounded the corners nicely. |
 |
Step 5: Put them in the photo studio. Doesn't the blue one remind you of the Tardis?
|
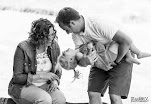
To see the chairs in action, you'll have to visit Tim's website at www.timwalckphotography.com.


Comments
Post a Comment
All comments will be reviewed before being posted. Please keep them clean! Thank you!